Friday, March 30, 2012

La torta di Ricotta di Mamma~Mom's italian cheesecake

With Easter right around the corner, I wanted to remind everyone of this lovely Italian Cheese cake.  This is an older post.  Enjoy!

I came across a variation of this wonderful cake made by many Italian Mom's in the 1960's.   My mother's version was baked and enough for an army of relatives.  It was traditonally served after dinner/lunch  during Easter and 4th of July celebrations.    This version is a no-bake version.  The light, flufffy texture of ricotta in combination with the cream cheese adds a whole new dimension to this cake. Any fresh  fruit topping will do.  Buon Appetito~

Ingredients
1 pound Whole Milk Ricotta cheese
11 0z of Cream cheese
3 tablespoons of vanilla extract
3/4 cup sugar
One 9 inch springform pan
1 pint Heavy Whipping cream
3 packages of lady fingers ( more or less to line the springform pan and enough to layer your ricotta cake)
For the glaze:
Use any fresh fruit in Season
I used Raspberries as it makes for a pretty presentation~
2 pints fresh Rasberries carefully rinsed and dried 2
2-3  tablespoons corn starch
3/4 cup water
1/4 cup good rasberry liquor
1/4 cup crushed rasberries
3/4 cup sugar
Carefully line your springform pan with lady fingers. All lady fingers should be flat side facing the interior of the pan. Line the bottom of the pan with lady fingers. If you springform is nonstick, it is not necessary to line anything with paper.
It is extremely important that your cheeses be room temperature for a creamier texture and no lumps. Carefully combine Ricotta, cream cheese, vanilla and sugar until all your ingredients are combined.
In a seperate chilled bowl carefully whip your whipping cream until good stiff peaks form
Carefully fold your whipped cream into your cheese mixture a litte at a time. You should see a nice fluffy consistency.
Pour your batter carefully into your springform pan halfway~Carefully place lady fingers across the top of the batter, creating another layer.
Pour your remaining batter into your pan.
Cover and refrigerate immediately
Needs 24 hours in the refrigerator to set and rest. Must be done one day ahead
For the Glaze.
Into a pan on low, heat  sugar, liquor, water. Slowly wisk in a handful of crushed raspberries. Let the sugar melt and dissolve until clear.  You will see your glaze almost bubble. Turn off heat and Whisk in 2-3  tablespoons of corn starch.  Back on low heat  until your glaze turns brighter red color and your glaze is gel like.. Should take about 4-5 minutes on low.  Set aside, cool, refrigerate.
about 1 hour before serving carefully place fresh rasberries across the top of your cake. Pour your cool glaze over your cake. Refrigerate for one hour.
Slice and serve~
Thank you to all of my friends who got to be the official taste testers of these 3 cakes~ hehe.. I am not the only one who has gained weight this week~ lol
Enjoy~Buon Appetito


Wednesday, March 28, 2012

Tomato Baguettes

Ingredients:
3 cups unbleached flour plus 1/2 cup extra flour for your counter
1 teaspoon plus a half of active, dry yeast
1 cup plus 1/2 cup of warm (to the touch), water
One tablespoon olive oil
One teaspoon salt

This basic bread dough is something I use all the time.  Whether for focaccia or pizza dough, simple baguettes or Panella bread, you will never forget such a great combination of ingredients.  The Italian kitchen is quite versatile, that is all you need to remember. The secret to successful breads is always in the rise.  The length of time the dough is resting and working to create a tasty end result.
The night before you plan on making these baguettes, combine your yeast and 1/2 cup water. This is a "no Knead method" that requires very little work.  Don't be alarmed.  Just follow these directions. I have been around bread making all of my life, and there is nothing complicated about it.  Just takes patience.  You will be glad you made some in the end and will be making it often.
If you are using a food processor, or by hand, this takes minimal effort.  After about 10 minutes, add your remaining water, flour olive oil and salt and pulse until you have a sticky combination of ingredients.  I did this by hand.  Using your hand, combine your ingredients.  Lets rest in an oiled bowl for 10-12 hours in a warm place.  Preferably inside a dark cabinet, covered, until the morning.
After about 10-12 hours, you will notice a sticky, risen dough.  Remove with your hands onto the counter and knead just once or twice into a ball.

Let rest another hour covered with plastic wrap.  It will look somewhat sticky.
Remove from bowl and cut in half with a pastry cutter or knife.  Shape carefully into a log and loosely cover with plastic. 

Shape into your pan.  They will continue to rise. 

Gently lift and place your risen baguettes into the pan.  Slice your Roma Tomato thin.  Let rest in the baguette pan another 30 minutes. Press your tomato slices directly into your bread.  Press down firmly.  (I did not and my tomato slices are somewhat elevated). 

Preheat your oven to 425 degrees/bake
When your oven is heated (15 minutes later), your baguettes should be plump and ready for the oven.  If you like, brush them with olive oil.  Do not worry if your dough looks like it's bubbly in places.  It is still rising.  Place in your oven for 45 minutes.  Your baguettes should be golden and slightly browned.  Remove them from the oven and let cool.  You will here the crackling noises of a freshly baked loaf of bread.  Buon appetito. It will be hard to resist.  Serve some sliced along with a salad.  A perfect light lunch.


Monday, March 26, 2012

Risotto con Carciofi e Frutta di mare (Risotto with artichoke and various seafood)


 With fresh Artichokes showing up at many local markets, I found it appropriate to re post this recipe. I hope you enjoy it. 
 Many people find it so intimidating to make risotto at home.  Once you have mastered the technique,  it's easy to do.  I am sure you will be looking for an excuse to make risotto again.  I made lots of mistakes in the beginning.   You should never rush risotto and please don't keep your flame up high.  This is a slow process that can't be rushed.  You need to give the flavors time to combine and your rice time to cook and rest before taking it to the table.
As you all know, I live in an area where fresh fish in non existent.     This was a great excuse to use it up what I had saved in the freezer.    I had handful of some shrimp along with some squid frozen from a another recipe. I cooked my  baby artichokes before my New York trip and placed them with their liquid in the freezer. The artichokes and their liquid give this risotto a wonderful creaminess without any addition of butter.  The delicate flavors combined make this dish the star of the show~ Had a few Calamari left to fry.  Just couldn't resist decorating with a few.  Had a hard time keeping my husband away from the kitchen

Ingredients for 6 people
1pound of Arborio rice / imported from Italy
3 tablespoons of extra virgin olive oil
1/2  medium Spanish onion/ or white onion diced
1 cup of white wine
approx. 1 cup artichokes cooked.  (They will be soft and fallen apart from having  been previously cooked in water).
3 cups of artichoke liquid
1/2 pound of large shrimp tails/shells removed/ cut up in small pieces.
1/2 pound squid/cut up
1/4 cup frying oil (for the fried squid tentacles) 
Parsley for garnish

Heat 4 tablespoons olive oil in a pan large enough to accommodate the risotto.  When Your oil is hot add your onion and saute until fragrant.   At this point add your shrimp and squid and saute.   When your fish is opaque which should take just a few minutes,  remove it from the pan.  Do not worry that your onion might not remain in your pan.  The important part here is that your olive oil is now enormously flavored.  Set aside your fish to cool.    Add your drained artichokes to the pan.  Reserve your cooking liquid from your artichokes.  Saute for 2 minutes.  Add your rice and mix.  Add your white wine and reduce.  After a few minutes, you will notice that your rice is dryer and sticking to the pan slightly. Keep mixing in steady round motion.   Begin adding your liquid, a cup at a time, stirring contstantly.  The stirring will cause the starch from the rice to release and the rice will cook.  Continue adding your liquid. Use This  process with the remaining liquid for about 20 minutes total. Keep you heat low.  Taste your rice.  It should be cooked and firm at al dente, your liquid evaporated and you should notice a creamy texture to the risotto. It is not necessary to use up all your liquid.  Or you may even need a little extra liquid.  You may use some reserved chicken broth or even water. if necessary.   Let rest about 10-15 minutes. Set your rice aside and add your fish to the top, mix and serve with crispy calamari on top (not typically done for decoration, but does look pretty). ~Buon appetito!

Special Note:  Save some extra calamari cut up and  add to some flour.  Shake off excess.   Fry in vegetable oil to cover until golden.  You will here them begin to pop some while they are cooking.  Drain, salt, a squeeze of lemon and serve as appetizer or sprinkle some on top of your risotto for decoration. 


Friday, March 23, 2012

Spaghetti di Magro

"I Pomodorini freschi ci cantano,"  translation, little, fresh tomatoes  are singing.   On a night that we just didn't know what to cook, being Italian came in handy.  A usual Friday night recipe, during this season of Lent, this recipe is delicious and easy to prepare.  My husband recalls his best friends mom,  used to make this and add mushrooms (Caldarelle) fresh from the country, outside Ascoli Piceno.  They are similar to chiodini or oyster mushrooms here in the States.  You can even make them without mushrooms, as we did this evening.
Ingredients for 4 people
1 pound  of spaghetti
3 tablespoons of olive oil
2 tablespoons garlic (I use elephant garlic, as it is milder in taste). chopped fine.  Or you can leave them large and remove them before serving. 
1 /12 oz can of tuna
1 can of black olives drained
2 tablespoons salted capers
1 teaspoon hot pepper flakes (optional)
2 cups of sweet 100 tomatoes, rinsed and split
1/ 2 cup white wine
1 tablespoon of salt for pasta water
No salt necessary for the sauce as the capers are salted.
1/4 cup chopped basil and more for garnish

In a skillet, enough to accommodate the finished dish, saute your garlic until fragrant.  This should take a minute or two.   Then, add your olives, capers, cut up tomatoes.  Add your white wine and reduce.  Mash with the back of a spoon for 5 minutes while mixing.  Turn off heat.  Add your Italian tuna.  If you can not get Italian tuna, drain white albacore in water  and mix in your sauce.  Cook your pasta as directed.  Serve with basil for garnish. Buon Appetito~

Wednesday, March 21, 2012

Flan (Tortino)


If you live in the United States, the ingredients in this classic flan are probably in your pantry right now.  I must admit, they were not in mine as I avoid anything having to do with a can as much as possible.  Sweetened condensed milk is nothing but milk and sugar that is thickened.   It should be illegal but I must admit, so delicious. I hope you can find it to give it a try.    I think my husband's Flan is a close second.  (We won't tell him).  This version,  I had never tried.  My husband's mother used to shop at Castroni in Rome begging them to carry the product with no such luck.  These days it has magically appeared on the shelf.   I figured it had been tested long before I was born, so why not try.  It just can't be any easier.  I must also admit that I burned the sugar and had to start over.  If this happens to you, don't pour it down the drain, as your pipes will harden and you will be calling the plumber.  I took my burned sugar outside and poured it out in the street.   The look on my neighbors face was priceless.  You see, it happens to everyone, so don't get discouraged by a little mishap in the kitchen. 

One can of Sweetened condensed milk/ 14oz
One can of evaporated milk / 12oz
3 large eggs
one cup of sugar plus 1/3 cup water
2 teaspoons of vanilla extract
6 ramekins / 6 oz
One baking dish that will fit all 6 ramekins.
About 6 cups of hot water
Preheat the oven to 350 degrees.
Melt the sugar and water over low heat.  Be very patient.  This will take a good 10 minutes or so.  When your sugar is melted, golden and clear, carefully pour caramel into the bottom of your ramekins.  Swirl the sugar  around your ramekin.  Carefully set them in your baking dish and set aside.
In a bowl, combine your eggs, Sweetened condensed milk, evaporated milk, vanilla extract and gently mix by hand until everything is incorporated.  Do not over beat.  Pour gently into your ramekins, about 3/4 full.   Pour your hot water gently into your baking dish until the water is about 1/3 high.  Your ramekins should be surrounded by water.  This will keep your mixture from burning.  Place in your preheated oven for 55- 60  minutes, loosely covered.  Cool completely and set in your refrigerator.  They will need at least 2 hours to cool in your refrigerator before you can serve.
To serve, cut around your flan with a sharp knife.  Set your base of your ramekin in hot water for 10 seconds.  Invert on a plate.  Your flan will come out onto the plate with a little pat.  Pour the remaining sugar (that has been loosened up by the heat of the water), over your Flan and serve.   You can also add fresh fruit across the top for a pretty presentation.


Buon Appetito!


Sunday, March 4, 2012

Pasta con le Melanzane (Eggplant sauce)


Since our cooking class was all about Eggplants, I thought it appropriate to show everyone how easy it is to make a great sauce with eggplants. If using small, Japanese eggplants or any smaller sweet, variety, they can be sliced and cooked. If using larger varieties, like Black Beauty, you may want to place them under salt for an hour or two to help extract the bitterness away from the eggplant.  You can oven roast them as we discussed in class by salting them, brushing them with olive oil and placing them into a 375 degree oven for 20 minutes. Oven roasting intensifies flavor. Whichever way, it's all delicious. 
What a great idea for a pasta sauce.  My mother could always make a meal for us out of very little and very few ingredients, life's simple pleasures.  It doesn't take much to make a fantastic pasta sauce. 

INGREDIENTS: 4 People
2 medium Japanese eggplants, (peeled if store bought, cut up and diced, skin on if out of the garden)
3 tablespoons red onion
1 tablespoon garlic
4 tablespoons olive oil (plus more for garnish)
1 handful of fresh basil
12 oz of tubular pasta (this form will hold the sauce well)
1 14 ounce can of diced tomatoes and there juice
1 cup water
1/2 cup white wine (optional, but adds fabulous flavor, your alcohol will evaporate away).
1/4 cup milk (to cut the acidity of both the eggplants and tomatoes)

In a pan, heat your oil on medium/low
Add your diced onion, garlic and eggplants and 1 teaspoon of salt.
Cover your pan.  After about 5 minutes check your vegetables are cooking but not sticking.  Give them a mix.   Continuing cooking until fragrant and your eggplants have become shiny and wilted.  Then add your tomatoes, wine, milk and stir.  Add some fresh basil and stir again.  Let sauce reduce by more than half.  This should take about 12-15 minutes on medium/low.   You will notice your sauce will thicken.   Set aside to cool.  In Meantime add your dry pasta to your boiling water.  Drain, mix with sauce.  Add Parmigiano Reggiano cheese if you like~ A great glass of Chianti goes well with this dish.   Buon Appetito~


Sunday, February 26, 2012

Pasta con Ceci


It's Monday night at the Giacometti's and I feel compelled to explain how this blog came about.   When exactly did Italian food get so complicated? When did it become about these huge portions of food?  My purpose is to  help expel those thoughts from your mind completely. Italian food is simple and delicious  in reality. It's is always about the fresh flavors of the ingredients.  Ingredients are never covered up.  They come together in a union to create something fantastic in the plate.  The Italians "Live for food."  Being Italian is not only about heritage, it's a lifestyle.
I felt compelled tonight to make something from the region of Tuscany.  A bean that is so often mis-understood here in the United States.  I keep Chick peas  (Garbanzo beans), frozen and cooked  in cup size portions ready to go in the freezer at anytime  If you are making these ahead, be sure  and rinse and leave them in water overnight.  They will need to boil for 3-4 hours and simmer in order to become tender.  Be sure that they are always covered in water while simmering.  Let them cool and place them in the freezer.  If you feel the need to use the canned variety that is fine.  There are many good varieties out there.  Be sure to drain and rinse.  Use them in the same fashion for this recipe.

Tonight's dinner is reflective of a reminder of Tuscany.  Ceci are typically served in a Minestra or soup with other vegetables. Typically hearty and served in winter.  Tonight, a Summer version,   Pasta with chickpeas with fresh Rosemary.   With Rosemary in abundance this time of year, this is the perfect quick and easy Pasta  to serve for a weekday dinner~ Buon Appetito~
Ingredients:
2 cups chick peas  (cooked and drained)
2 garlic gloves or 4 tablespoons of white onion
4 tablespoons of olive oil plus 1 tablespoon vegetable oil (addtionial olive oil to garnish).
3 tablespoons of fresh rosemary chopped fine for garnish
Optional pint of sweet 100's tomatoes or pomodorini
1 teasspoon of salt
1 teaspoon of pepper
Additonal salt and pepper for the table

Into a pan 2 tablespoons of olive oil, 2 sprigs of fresh Rosemary.  Remove your Rosemary as it is only to flavor the oil.   Saute your garlic until fragrant.  (You may remove it from the pan  or continue, as your oil will be flavored).   After just a few minutes place your 2 cups of drained chickpeas into your olive oil and mix.  Add your salt and pepper.  Keep your heat on med/ low and crush  some of your  cooked chickpeas with the back of a spoon.  Leave some whole as it is very pretty in a tubular pasta when served.  Cook for 7 minutes.  It is here that you might want to add your pomodorini  cut in half.  It is not necessary as the dish is flavorful without this addition, however I will add them on occasion when they are available out of my garden.    Place your lid on the pan and remove from heat.  Cook your pasta.  Rigatoni is recommended or any tubular shaped pasta.  Drain and mix with your chickpeas  and / or tomatoes.  Add additional olive oil.    Add fresh chopped rosemary for Garnish~ Buon Appetito!

Thursday, February 23, 2012

Strozza Preti con Gamberi, Zucchine e Scalogno Dorata ( Pasta with Shrimp, Zucchini, and golden Scallions

 I came across these interesting, Organic, Italian Zucchini at the Whole foods Market in Birmingham, Alabama.  I was intrigued, since they were so tiny compared to their American counterpart.   I refuse to buy zucchini in Winter. They just breakdown into a pool of water when cooked.  Not worth the effort nor the price.  Sometimes you just have to step out of your comfort zone and give it a try.  I bought three.  They were under a pound in total.   How far can this go?  Pretty far in a pasta dish.  What a nice surprise.  A quick saute with garlic and scallions and the zucchini surprisingly held together.   What a surprise to taste such great flavor.   This "Strozza Preti" pasta is the perfect choice for this dish. (The Pasta term translates to "Strangled Priests, due to their twisted collar shape).  The Condimento coats the outside of this pasta so well while the remaining olive oil seeps into the pasta itself creating great flavor.  I just had to have a little extra.  I hope you like it.  Buon Appetito!
Ingredients:  4 people
12 oz of Pasta / Strozza Pretti/ Fussili/ Cavatappi/ or Small Penne
3 tablespoons of olive oil
2 cloves of garlic diced (about a teaspoon)
2 scallions trimmed and diced into tiny pieces
3 small zucchini (about a pound) Julianne (sliced long and thin with a sharp knife).
3/4 pound of raw shrimp/ or cooked shrimp.
(you will have to either saute the shrimp in the same pan or add your cooked shrimp at the end of your recipe). 
One teaspoon of salt 
One teaspoon of pepper
a few red pepper flakes
1/3 cup chopped fine fresh Parsley 
One tablespoon of salt for your pasta water. 
Additional Olive oil to drizzle over your pasta if you like
Method:
Place a large enough skillet on the stove top and heat (large enough to accommodate your pasta at the end).  Put your water on to boil for your pasta. Don't forget to put salt in the water!  (If you are using raw shrimp, place your Shrimp in your hot pan with one tablespoon olive oil  and quickly saute until pink. Add 1/3 cup white wine and let evaporate.  Remove them from the pan and set aside.  Wipe out your pan to re use.  Do not wash).   Turn your heat to medium and add your olive oil.  saute your garlic and scallions.  Add your zucchini, a teaspoon of salt  and cook until wilted, slightly golden and fragrant (About 4-6 minutes).  Turn your heat off and  place your cooked shrimp in your pan and give it a mix.( There is no need to add wine if you are using shrimp already cooked). Add your black and red pepper.  Set aside to cool. 

Cook your pasta in salted water and drain.  Toss with fresh, chopped parsley and serve.  Buon Appetito


Optional:  For additional color and flavor, add a tablespoon of tomato paste to your scallions and garlic when fragrant and mix in the skillet for just a minute.   Add your zucchini to the pan and cook as directed above.  This will give this dish additional color and flavor. 

Monday, February 20, 2012

Pasta con Asparagi, Gamberi e Arugula~ (Spaghetti with Asparagus, Shrimp and Arugula)

I am so happy to see so much excitement over this recipe.  I had a little fresh Arugula from my garden that would not be enough for a salad.  Why not toss it into some Pasta?  When Arugula nears the end of it's growing season, it's so incredibly spicy.  It's the perfect addition to this dish.  Had some fresh, frozen Pacific shrimp ready to go.  Pasta is always on hand.  Had just enough Asparagus left to make this dish~ What a great combination of texture and flavor.  You can use a shell type Pasta too as it would make for a terrific presentation.  I am a huge Spaghetti fan.  Can you tell?

Ingredients: For 4 people
1/2  pound of medium shrimp, cleaned, deviened, tails cut off.
2 cloves of garlic diced
12 oz spaghetti imported from Italy.  I use DeCecco
3 tablespoons olive oil
2 tablespoons butter
1 cup of white wine
1 teaspoon salt
1 teaspoon black pepper
1 handful (about 3 oz) of Arugula, washed and cut

Method:  Dice your garlic and set aside. Trim the woodsy bottom off your asparagus tips.  About 2 inches off the bottom. Blanch your asparagus in water with salt for 3-4 minutes.  Add a pinch of baking soda to help retain your green color of your asparagus.  Cut up, and set aside.  Into a heated pan add your olive oil, garlic.  Saute until fragrant.  Add your shrimp and a teaspoon of salt to the pan.   Cook for 2 minutes on each side until your shrimp turn pink and are almost cooked through.  I used  medium/Large shrimp here.  Add your white wine and turn up your heat.  Add your butter to your pan and let reduce.  In just a short 3-4 minutes add your cut up asparagus.   Add additional Salt and pepper to taste.  Set your sauce aside to cool slightly. A lovely sauce will be left in the pan.  In a Pasta pot filled with boiling water, add your pasta.  Cook, until al dente.  Drain and  add to your pan.  Mix with your Fresh Arugula.  If you don't have Arugula, Baby spinach or chicory will do nicely.  Enjoy and Buon Appetito~

Special Hint:  You can substitute Sea Scallops for your Shrimp.  They will require a longer cooking time but just by a few minutes. 
They can be quite large and substantial so you might want to cook less pasta to serve ~

Wednesday, February 15, 2012

Risotto al Merluzzo e Peperoni (Codfish and roasted Red Peppers)


Who said there was nothing for dinner?
This is what happens when you only have one of everything left in the refrigerator and freezer.   One piece of codfish, One roasted red Pepper, some extra Roasted yellow pepper and some good salty Sicilian capers, yields one great Risotto.
Serves 4 people
Ingredients:  One 12 oz piece of codfish
2 cups of Arborio rice
3 tablespoon olive oil
2 tablespoons white onion
2 tablespoons salty capers
1-2 roasted red and yellow peppers, drained and cut up
4-5 cups vegetable or fish stock heated
one cup of white wine
In a deep skillet or Risotto pan, heat your oil.  Saute your onion until fragrant.  Cut up your fish into 1 inch bite size cubes.  Saute in your pan until opaque.  Add 1/2 cup of white wine and let evaporate.   Remove your fish from the pan and set aside.  In the same pan, add your rice and mix.  Add another 1/2 cup of white wine and let the wine evaporate some.  Begin adding your liquid.  Keep adding  in your liquid,  a cup at a time. Let each evaporate some after each addition.


 Keep cooking in the same fashion for approximately 18 minutes.  Make sure your liquid is evaporating in a slow steady pace. You want it boiling away on medium/ low.   Add your fish, peppers, capers, back to the pan and continue to stir for two more minutes.   Turn your heat off and let rest for approximately 5 minutes before serving. 

Give it another stir and place in serving bowls.  Serve topped with some fresh parsley and a great big glass of Pinot Grigio.  Buon Appetito.

Monday, February 13, 2012

Pollo alla Romana (Chicken Roman Style)


Red Bell Peppers, Chicken and Tomatoes

You better have some extra crusty bread on hand for this dish.  Pollo alla Romana or chicken Roman Style, will have you going back for more.  Served traditionally in a Trattoria or family style Restuarant, in Rome Italy, you may want to wear some comfortable clothes to the restaurant.  It will be hard to stop eating.   Here is my version based on a very traditional recipe handed down by my husbands Aunt Dora, a Roman Native.
Ingredients: Serving 4 people

3 tablespoons olive oil and one tablespoon vegetable oil
One 4-5 pound chicken cut up into small pieces/ 80 percent of skin removed.
1 teaspoons of pepper
2 teaspoons of salt
1/2 cup chopped white or yellow onion
1 cup of white wine
2 cups of of chopped tomatoes and their juice
1/2 cup of water
2 red bell peppers, seeded and sliced thin
3 large cloves of garlic diced into tiny pieces.
Basil or parsley for presentation
Method:
If you can, begin the night before.  Clean and cut up your chicken.  Squeeze some lemon juice all over your cleaned chicken.  Toss and cover your chicken and place in the refrigerator overnight.  (This will remove the game taste from your chicken).
The next day remove your chicken from your refrigerator approximately 30 minutes before cooking. Dry with paper towels.  Add one teaspoon of salt and one teaspoon of pepper to your chicken pieces.

Orange Bell Pepper was substituted here~

In a deep skillet, add 2 tablespoons olive oil and your vegetable oil.   Brown your chicken pieces for about 5 -7 minutes.  Set your chicken aside.   Using the same pan, drain your fat.  Take a paper towel and wipe out your pan and set back onto the stove. Turn your heat to medium.  Add your last tablespoon of olive oil to the same pan. 

 Add your onion, garlic and red bell peppers.  Add your teaspoon of salt.  Cook until your vegetable are wilted and fragrant, about 5 minutes on medium.  

At this point add your chicken back to the pan. 


Add your white wine scraping the bottom of the pan.   Add your tomatoes.  Add a teaspoon of salt.  Reduce your heat to a simmer.  Place your lid to your pan ajar, and let cook until the oil separates from the chicken and a ring forms away from the chicken along the rim of the pan.  This should be cooked through in about 45 minutes.  Buon Appetito~


Monday, February 6, 2012

Porchetta (Version 2, Superbowl Sunday)

I like to marinate my cut of meat the day before in a cup of white wine.  You do not have to.  I begin the morning before I will place it in the oven.

Here in the United States, it's a real challenge to find a good cut of Pork for this dish. In Italy, the whole Pork is usually roasted by a vender selling delicious sandwiches on the side of the road. At home,  the Pig,  belly cut,  is usually flatter than most around the Pig, so it's easiest to handle for the home cook. It also requires less work than di-boning a Butt roast.   I am in Tupelo, Mississippi where pulled pork is everywhere covered in sweet BBQ sauce.  They have never had my Porchetta and it's to bad.  Pork doesn't need to be covered up in BBQ sauce to be good.   Here is my version.  I hope you agree, it's good.  Just prepare it the night before.  Place it in the low oven, and go to sleep.  In the morning there will be a surprise before your very eyes.  Dinner is ready!  Turn your oven off and let it rest.  Lunch or dinner, it will be very hard to resist. You will be very tempted to give it a taste.  Buon Appetito!
Ingredients:  One 8-10 pound Pork Belly/ Boston Butt Roast bone in. (You will di-bone, if you are using Pork from the belly, you will pound and flatten)
8-10 cloves of garlic/ cleaned/ peeled
4 tablespoons fennel seeds (toasted in the pan with a pinch of salt for about 5 minutes.  You will notice the fennel will begin to be fragrant.  Do not burn them. If you do, throw them away and start again). 
If you are using fresh fennel Cut your fennel bulb in pieces and place in the food processor and chop fine.   Add one tablespoon of toasted fennel seeds to your fresh fennel). Set this aside in bowl.
3 teaspoons of salt 
3 teaspoons of pepper
2 tablespoons of ground sage
8 springs of rosemary, removing the rosemary from the stems, place in food processor chop, set in your bowl with your fennel
Place all your chopped ingredients into a bowl and mix in your olive oil.  Set aside.
1/4 cup olive oil (for your paste)
kitchen string

METHOD:
Place your meet on a large cutting board.  Place your knife along the bone and cut around the bone.  Open up your cut of meat in half, and then again in a Third.  Lay the meat fat side down on your board.  Your piece of meat is now laying out in length, rather than sitting up in height.  You should have a rather flat piece of meat.  (Do not be alarmed if it's uneven, we will be rolling it up in just a minute). 
Place a piece of wax paper, parchment or saran wrap over your meat, pound and flatten.  Take your bowl of herbs, garlic,  fennel, seeds, etc. and add your olive oil salt and pepper. You should get a little pasty concoction that smells wonderful.  Make tiny slits (Be careful not to cut through). across your flattened meat and massage your meat with your paste.  You should have enough for the entire piece but don't worry, it will be rolled and filled with flavor.

Preheat your oven to 225 degrees.

Carefully roll your meat as tightly as possible.  At this point, I like to roll a piece of heavy duty wrap around it and set it in the pan and into the refrigerator to take shape (optional).   Quickly remove from refrigerator after 30 minutes, remove your paper and tie up your roast.   Brush a tablespoon or two of olive oil across the top. 
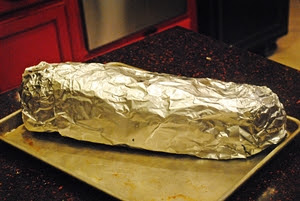
Wrap in foil very well.  Seal in the entire roast and lay on a cookie sheet or large enough baking pan.   Place in a 225 degree oven for 9-10 hours.  My general rule is one hour per pound on low heat.  I placed it in the oven overnight. 


In the morning, turn your oven off.  Leave it in the oven until about an hour before serving.  You will heat it up later or serve at room temperature after broiling the top).(

Carefully remove from oven.  Turn your package over on the baking sheet. Cut across the top and place your oven on broil.  Set with the foil opened well but not removed, back in the oven for 7-9 minutes.  Check on it carefully as you don't want the top to burn just crisp up.
Remove from oven and let rest a few minutes until foil cools down.  Then carefully pull out and remove foil.  Remove your strings, slice and serve.  It will fall apart very easily.  Traditionally slice if you can.  It will be hard not to have a taste in that moment.  Enjoy!

Special note:  Porchetta  can be found throughout Italy and varies in cooking style Regionally and even by neighboring towns.   They are all quite similar in taste.  Wild fennel as well as fresh Pork,  gives it a more intense flavor.  Enjoy!
Do not worry about how large the Porchetta looks wrapped up. In the morning, you will notice some shrinkage inside the tightly wrapped package.  This is normal due to fat content.

DO NOT USE PORK LOIN.  IT WILL NOT WORK. 


Wednesday, January 25, 2012

Pollo alla Valdostana (chicken breast rolls, from the region of Valle D'Aosta), Eggplant and zucchini trifolati (sauteed with garlic and parsley)


This fabulous recipe comes from a tiny region  that borders France on the North western corner of Italy. This chicken breast is served sometimes layered in proscuitto and cheese.  This version is my favorite way to make it. 
Ingredients for 4 servings
6 boneless chicken breasts pounded thin
6 sage leaves or 6 parsley leaves
6 slices of Prosciutto ham
6 slices of fontina cheese (any mild cheese will be fine)
4 tablespoons olive oil
1 cup of flour more or less in a plate  for dredging rolls before cooking

for the sauce
1/2 cup white wine
1/2 cup chicken broth
1 tablespoon butter

Pound your chicken breasts out until nice and thin.  Keep you chicken breasts flat on a work surface.  Working one at a time, layer a piece of cheese, sage and prosciutto over each piece.  Carefully roll your chicken breast as tightly as possible. To ensure that its tight and stays that way, cut a piece of plastic wrap about twice the size of your roll.  Then, carefully and very tightly roll your plastic wrap around your newly formed chicken breast rolls.  Wrap and close the ends tightly.  Place in the refrigerator to firm up before cooking. These should be refrigerated at least 3 hours or overnight.  If you do not have time, you can always insert toothpicks to hold the roll together.  Be sure and remove your toothpicks before serving.


Preheat your oven to 350 bake
Heat your olive oil in a pan.  Carefully unwrap your plastic wrap from your chicken rolls.  You will notice that your rolls are staying together.  Carefully dredge your rolls in flour, shaking off excess.
Insert your chicken rolls into your pan.  Do not worry if your chicken rolls look crowded.  You will only need to turn them once while cooking.
Let cook approximately 5 minutes.  You will notice they will begin to turn golden as you turn them to cook.  Leave them in the pan for approximately 5 more minutes and place your pan in a preheated 350 degree oven.  Cook 45  minutes on bake depending on the thickness of your chicken breasts.  They should be about 3 inches in diameter.


Sauce:
Remove your chicken rolls from the pan and let rest 10 minutes before serving.
In the meantime, place your pan on medium heat on the stove, add your white wine, broth, butter, and let reduce for 5 minutes.  You will notice your sauce will thicken some.  Spoon it over your chicken breast rolls and serve with your side of Vegetables trifolati!

I served these today with sauteed (trifolati) vegetables from this mornings garden.  Vegetables that are trifolati are quickly sliced or diced, then sauteed in olive oil, garlic and parsley.  Fast, easy and flavorful! The perfect side item.
Ingredients
2 Japanese eggplants sliced thinly
2 medium zucchini sliced thinly
one clove of garlic
3 tablespoons of fresh parsley for garnish and to taste
3 tablespoons of Olive oil

In a colander place your sliced vegetables and salt them with one tablespoon of salt.  Let sit for 45 minutes.  Dry your vegetables with paper towels and set aside.  In a skillet, enough to accommodate your cut up vegetables heat 3 tablespoons olive oil to medium.  Carefully insert your cut up clove of garlic until fragrant (about 20 seconds), then insert your vegetables and cook for 5-6 minutes tossing lightly.  Do not worry if your vegetables begin to fall apart and get soft.  They are supposed to look that way.  Remove from heat, add crushed black pepper to taste and serve.  Salt is not necessary since some salt will remain on your vegetables prior to cooking. 
*** Special note:  If you do not like garlic you can substitute a shallot.  Use it in the same manner you would garlic.***